Nextjs 轻松实现文件上传到云存储
本文实战在 Next.js 中自建图片上传组件:预览、删除、Loading 全齐;前端配合 STS 获取临时密钥,使用 cos-js-sdk-v5 将文件直传腾讯云 COS,并给出完整代码。
背景目标
最近在做一个项目,需要用到图片上传功能。使用的组件库是 shadcn,查阅文档后发现没有封装类似 Upload 的组件,于是自己写了一个简单易用的图片上传组件。
实现目标
- 交互良好的组件
- 支持图片预览
- 支持删除预览图
- 上传过程中支持 Loading 状态
- 将图片上传到云存储桶(这里使用的是腾讯云对象存储 COS)
组件
基础
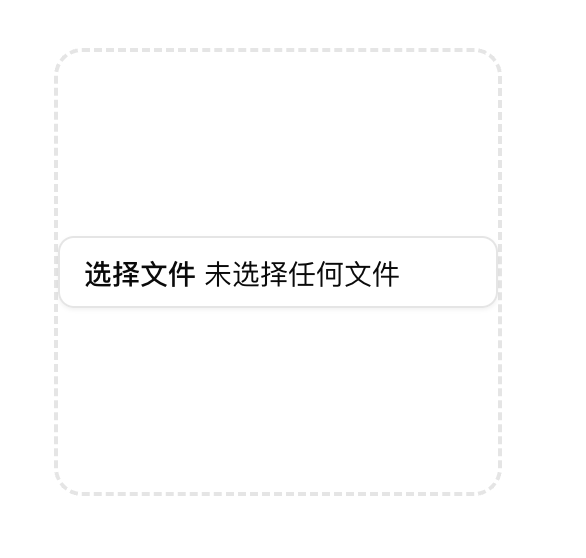
最基本的上传功能通过 input 标签即可实现。项目中使用的 shadcn 组件库对原生 input 标签做了封装,可以直接拿来用:
// image-upload.tsx
import { Input } from "@/components/ui/input";

export default function ImageUpload({ name }: { name: string }) {
  return (
    <Input type="file" name={name} accept="image/png, image/jpg, image/jpeg" />
  );
}
接收名为 name 的 prop,用来指定该表单控件的唯一标识。
效果:

图片预览
要实现已上传图片的预览,首先需要拿到上传的图片内容:
// image-upload.tsx
import { useState } from "react";
import { Input } from "@/components/ui/input";

export default function ImageUpload({ name }: { name: string }) {
  // 声明状态,存储预览缩略图
  const [previewImg, setPreviewImg] = useState<string | null>(null);
  // 上传处理
  const handleUpload = (files: FileList | null) => {
    if (!files?.length) {
      return;
    }
    // 仅支持单个图片上传
    const file = files[0]
    // 图片不可超过 5M
    if (file.size > 1024 * 1024 * 5) {
      console.error("Please keep the file size less than 5MB.");
      return;
    }
    // 生成预览缩略图
    const previewImg = URL.createObjectURL(file)
    setPreviewImg(previewImg)
  };
  return (
     <Input
       type="file"
       name={name}
       accept="image/png, image/jpg, image/jpeg"
       onChange={(e) => handleUpload(e.target.files)}
     />
  );
}
注意这里生成缩略图的方法,是将获取到的 File 数据传给 URL.createObjectURL。
因为只支持单个图片上传,不需要用列表呈现已上传图片,直接将图片覆盖在原位置即可。下面对样式做一些调整:
// image-upload.tsx
import { useState } from "react";
import Image from "next/image";
import { Input } from "@/components/ui/input";

export default function ImageUpload({ name }: { name: string }) {
  // 声明状态,存储预览缩略图
  const [previewImg, setPreviewImg] = useState<string | null>(null);
  // 上传处理
  const handleUpload = (files: FileList | null) => {
    ....
  };
  return (
    // 添加图片预览容器
    <div className="border-border flex h-56 w-56 items-center justify-center rounded-xl border-2 border-dashed">
      {previewImg ? (
        <div className="flex h-full w-full items-center justify-center p-6">
          <Image
            alt={`image preview`}
            width={172}
            height={172}
            src={previewImg}
            className="h-full object-contain"
          />
        </div>
      ) : (
        <Input
          type="file"
          name={name}
          accept="image/png, image/jpg, image/jpeg"
          onChange={(e) => handleUpload(e.target.files)}
        />
      )}
    </div>
  );
}
效果:
未上传图片

上传图片
接着,对上传按钮的样式和文案进行一些优化:
// image-upload.tsx
import { useState } from "react";
import Image from "next/image";
import { Input } from "@/components/ui/input";

export default function ImageUpload({ name }: { name: string }) {
  // 声明状态,存储预览缩略图
  const [previewImg, setPreviewImg] = useState<string | null>(null);
  // 上传处理
  const handleUpload = (files: FileList | null) => {
    ....
  };
  return (
    // 添加图片预览容器
    <div className="border-border flex h-56 w-56 items-center justify-center rounded-xl border-2 border-dashed">
      {previewImg ? (
        ....
      ) : (
	    <Label className="border-border relative h-10 cursor-pointer rounded-lg border bg-gray-600 p-4 text-amber-50">
          Upload Image
          <Input
            type="file"
            name={name}
            accept="image/png, image/jpg, image/jpeg"
            onChange={(e) => handleUpload(e.target.files)}
            className="absolute top-0 left-0 z-[-1] h-full w-full rounded-lg opacity-0"
          />
        </Label>
      )}
    </div>
  );
}
效果:

删除预览图
在预览图片右上角添加删除按钮:
// image-upload.tsx
import { useState } from "react";
import Image from "next/image";
import { X } from "lucide-react";
import { Input } from "@/components/ui/input";

export default function ImageUpload({ name }: { name: string }) {
  // 声明状态,存储预览缩略图
  const [previewImg, setPreviewImg] = useState<string | null>(null);
  // 上传处理
  const handleUpload = (files: FileList | null) => {
    ....
  };
  return (
    // 添加图片预览容器
    <div className="border-border flex h-56 w-56 items-center justify-center rounded-xl border-2 border-dashed">
      {previewImg ? (
        <div className="flex h-full w-full items-center justify-center p-6">
          <div className="relative h-full">
            <X
              onClick={() => {
                setPreviewImg(null);
              }}
              className="absolute top-0 right-0 size-5 translate-x-[50%] -translate-y-[50%] cursor-pointer rounded-full border border-gray-600 bg-white p-0.5 text-gray-600 opacity-80"
            />
            <Image
              alt={`image preview`}
              width={172}
              height={172}
              src={previewImg}
              className="h-full object-contain"
            />
          </div>
        </div>
      ) : (
		  ...
      )}
    </div>
  );
}
到这里,UI 组件除了 Loading 部分外已经全部实现(Loading 放到最后处理)。接下来要做的,就是将前端获取到的文件上传到云存储。
上传到云存储
首先需要有一个云存储服务。市面上常见的有亚马逊云(AWS)、腾讯云、阿里云等,我这里使用的是腾讯云对象存储(COS)。
SDK
查阅腾讯云相关文档后发现,可以直接在前端调用腾讯云上传 SDK:cos-js-sdk-v5。
生成临时密钥
上传到私有存储桶,需要使用在购买云存储时生成的密钥。但永久密钥直接暴露在前端并不安全,因此需要改用临时密钥。
根据文档 临时密钥生成及使用指引 生成临时密钥。
Next 支持在文件路由系统中直接添加 API 接口(API Route)。这里创建接口 /api/STS 用于获取临时密钥:
// app/api/STS/route.ts

import STS from 'qcloud-cos-sts'
import { NextResponse } from 'next/server';

export async function GET() {
  // 配置参数
  const config = {
    secretId: process.env.COS_SECRETID, // 固定密钥
    secretKey: process.env.COS_SECRETKEY, // 固定密钥
    proxy: '',
    durationSeconds: 3600,
    // host: '[sts.tencentcloudapi.com](http://sts.tencentcloudapi.com)', // 域名,非必须,默认为 [sts.tencentcloudapi.com](http://sts.tencentcloudapi.com)
    // endpoint: '[sts.tencentcloudapi.com](http://sts.tencentcloudapi.com)', // 域名,非必须,与host二选一,默认为 [sts.tencentcloudapi.com](http://sts.tencentcloudapi.com)

    bucket: 'your bucket',
    region: 'your bucket region',
    allowPrefix: '*', // 允许的路径前缀,可以根据用户登录态限制具体路径,如 a.jpg / a/* / *(使用 * 存在重大安全风险,需谨慎评估)
    // 简单上传和分片上传需要以下权限,其他权限列表请看 [https://cloud.tencent.com/document/product/436/31923](https://cloud.tencent.com/document/product/436/31923)
    allowActions: [
      // 简单上传
      'name/cos:PutObject',
      'name/cos:PostObject',
      // 分片上传
      'name/cos:InitiateMultipartUpload',
      'name/cos:ListMultipartUploads',
      'name/cos:ListParts',
      'name/cos:UploadPart',
      'name/cos:CompleteMultipartUpload'
    ],
  };
  const shortBucketName = config.bucket.split('-')[0]
  const appId = config.bucket.split('-')[1]
  const policy = {
    'version': '2.0',
    'statement': [{
      'action': config.allowActions,
      'effect': 'allow',
      'principal': { 'qcs': ['*'] },
      'resource': [
        'qcs::cos:' + config.region + ':uid/' + appId + ':prefix//' + appId + '/' + shortBucketName + '/' + config.allowPrefix,
      ],
    }],
  };
  try {
    const data: STS.CredentialData = await new Promise((res, rej) => {
      STS.getCredential({
        secretId: config.secretId as string,
        secretKey: config.secretKey as string,
        proxy: config.proxy,
        durationSeconds: config.durationSeconds,
        // endpoint: config.endpoint,
        policy: policy,
      }, function (err, tempKeys) {
        if (err) {
          rej(err)
        } else {
          res(tempKeys)
        }
      });
    })
    return NextResponse.json({ code: 200, data })
  } catch (e) {
    return NextResponse.json({ code: 500, error: e })
  }
}更多细节可以查看 [qcloud-cos-sts](https://github.com/tencentyun/qcloud-cos-sts-sdk/tree/master/nodejs)  仓库以及官方 Demo:[官方 demo](https://www.notion.so/Nextjs-2acbb1b4277e8066b881ddc42e41a41a?pvs=21)
创建 COS 实例
有了临时密钥,就可以用它来创建 COS 实例了(COS 即腾讯云提供的上传 SDK):
// lib/cos.tsx

import COS from 'cos-js-sdk-v5'
import { IGetSTSCredentialRes } from '@/lib/definitions'

/**
 * @description 获取 COS 临时密钥
 * @returns { STSCredential } 密钥
 */
export async function getSTSCredential() {
  const res: IGetSTSCredentialRes = await fetch('/api/STS').then(res => res.json())
  if (res.code !== 200) {
    console.error('Sorry, Get credential failed. Please try again later.')
    return null
  }
  return res.data
}

const cos = new COS({
  getAuthorization: async function (options, callback) {
    const data = await getSTSCredential();
    if (!data) {
      return
    }
    callback({
      TmpSecretId: data.credentials.tmpSecretId,
      TmpSecretKey: data.credentials.tmpSecretKey,
      SecurityToken: data.credentials.sessionToken,
      StartTime: data.startTime, // 时间戳,单位秒
      ExpiredTime: data.expiredTime, // 时间戳,单位秒
      ScopeLimit: true, // 细粒度权限控制需要设为 true,会限制密钥只在相同请求时重复使用
    });
  }
})

export default cos
完善上传组件
在组件中调用 COS 实例的上传方法
回到 image-upload.tsx 组件,在 handleUpload 中调用 cos 实例上传文件:
// image-upload.tsx

import { useState } from "react";
import Image from "next/image";
import { X } from "lucide-react";
import { Input } from "@/components/ui/input";
import cos from "@/lib/cos";

export default function ImageUpload({ name }: { name: string }) {
  // 声明状态,存储预览缩略图
  const [previewImg, setPreviewImg] = useState<string | null>(null);
  // 上传处理
  const handleUpload = async (files: FileList | null) => {
    if (!files?.length) {
      return;
    }
    // 仅支持单个图片上传
    const file = files[0]
    // 图片不可超过 5M
    if (file.size > 1024 * 1024 * 5) {
      console.error("Please keep the file size less than 5MB.");
      return;
    }
    const data = await cos.uploadFile({
      Bucket: "your bucket",
      Region: "your bucket region",
      Key: file.name,
      Body: file,
    });
    if (data && data.statusCode === 200) {
    // 使用上传后得到的图片地址作为缩略图
      setPreviewImg("https://" + data.Location)
    } else {
      console.error(
        "Sorry, there was an error uploading the file. Please try again later.",
      );
    }
  };
  return (
    // 添加图片预览容器
    <div className="border-border flex h-56 w-56 items-center justify-center rounded-xl border-2 border-dashed">
      ...
    </div>
  );
}
上传成功后,可以从返回值中获取上传图片的地址,因此不再需要通过 URL.createObjectURL 来生成预览图。
添加Loading
最后,在上传过程中添加 Loading,进一步优化交互体验:
// image-upload.tsx
import { useState } from "react";
import Image from "next/image";
import { X } from "lucide-react";
import { Input } from "@/components/ui/input";
import { Skeleton } from "@/components/ui/skeleton";
import cos from "@/lib/cos";

export default function ImageUpload({ name }: { name: string }) {
  // 声明状态,存储预览缩略图
  const [previewImg, setPreviewImg] = useState<string | null>(null);
    // 图片上传中状态
  const [loading, setLoading] = useState<boolean>(false);
  // 上传处理
  const handleUpload = async (files: FileList | null) => {
    ...
    setLoading(true)
    const data = await cos.uploadFile({
      Bucket: "your bucket",
      Region: "your bucket region",
      Key: file.name,
      Body: file,
    });
    setLoading(false)
    ...
  };

  const render = () => {
	  if (loading) {
      return (
        <div className="flex h-full w-full items-center justify-center p-6">
          <Skeleton className="h-full w-full" />
        </div>
      )
    }
    return (
      <>
	      {previewImg ? (
		      <div className="flex h-full w-full items-center justify-center p-6">
	          <div className="relative h-full">
	            <X
	              onClick={() => {
	                setPreviewImg(null);
	              }}
	              className="absolute top-0 right-0 size-5 translate-x-[50%] -translate-y-[50%] cursor-pointer rounded-full border border-gray-600 bg-white p-0.5 text-gray-600 opacity-80"
	            />
	            <Image
	              alt={`image preview`}
	              width={172}
	              height={172}
	              src={previewImg}
	              className="h-full object-contain"
	            />
	          </div>
	        </div>
	      ) : (
	        <Label className="border-border relative h-10 cursor-pointer rounded-lg border bg-gray-600 p-4 text-amber-50">
	          Upload Image
	          <Input
	            type="file"
	            name={name}
	            accept="image/png, image/jpg, image/jpeg"
	            onChange={(e) => handleUpload(e.target.files)}
	            className="absolute top-0 left-0 z-[-1] h-full w-full rounded-lg opacity-0"
	          />
	        </Label>
	      )}
      </>
    )
  }
  return (
    // 添加图片预览容器
    <div className="border-border flex h-56 w-56 items-center justify-center rounded-xl border-2 border-dashed">
      {render()}
    </div>
  );
}
总结
得益于 Next.js 的特性,可以很方便地在同一个项目中同时编写前端代码和简单的后端接口,而不需要再单独部署一个 Node 服务。
完整代码:
// image-upload.tsx
import { useState } from "react";
import Image from "next/image";
import { X } from "lucide-react";
import { Input } from "@/components/ui/input";
import { Skeleton } from "@/components/ui/skeleton";
import cos from "@/lib/cos";

export default function ImageUpload({ name }: { name: string }) {
  // 声明状态,存储预览缩略图
  const [previewImg, setPreviewImg] = useState<string | null>(null);
  // 图片上传中状态
  const [loading, setLoading] = useState<boolean>(false);

  const handleUpload = async (files: FileList | null) => {
    if (!files?.length) {
      return;
    }
    // 仅支持单个图片上传
    const file = files[0];
    // 图片不可超过 5M
    if (file.size > 1024 * 1024 * 5) {
      console.error("Please keep the file size less than 5MB.");
      return;
    }
    setLoading(true);
    const data = await cos.uploadFile({
      Bucket: "lifephoto-1253367486",
      Region: "ap-guangzhou",
      Key: file.name,
      Body: file,
    });
    setLoading(false);
    if (data && data.statusCode === 200) {
      // 使用上传后得到的图片地址作为缩略图
      setPreviewImg("https://" + data.Location);
    } else {
      console.error(
        "Sorry, there was an error uploading the file. Please try again later.",
      );
    }
  };
  const render = () => {
    if (loading) {
      return (
        <div className="flex h-full w-full items-center justify-center p-6">
          <Skeleton className="h-full w-full" />
        </div>
      );
    }
    return (
      <>
        {previewImg ? (
          <div className="flex h-full w-full items-center justify-center p-6">
            <div className="relative h-full">
              <X
                onClick={() => {
                  setPreviewImg(null);
                }}
                className="absolute top-0 right-0 size-5 translate-x-[50%] -translate-y-[50%] cursor-pointer rounded-full border border-gray-600 bg-white p-0.5 text-gray-600 opacity-80"
              />
              <Image
                alt={`image preview`}
                width={172}
                height={172}
                src={previewImg}
                className="h-full object-contain"
              />
            </div>
          </div>
        ) : (
          <Label className="border-border relative h-10 cursor-pointer rounded-lg border bg-gray-600 p-4 text-amber-50">
            Upload Image
            <Input
              type="file"
              name={name}
              accept="image/png, image/jpg, image/jpeg"
              onChange={(e) => handleUpload(e.target.files)}
              className="absolute top-0 left-0 z-[-1] h-full w-full rounded-lg opacity-0"
            />
          </Label>
        )}
      </>
    );
  };

  return (
    <div className="border-border flex h-56 w-56 items-center justify-center rounded-xl border-2 border-dashed">
      {render()}
    </div>
  );
}